Wednesday 12 February 2014

DIY Greeting Card Envelope Tutorial


 Hello there! I have a couple of Valentine's projects, just little simple things to post, with a ton more awful amateur blog photos. I'm going to share the other thing after he opens his present though, because he might see it here and it might ruin the all sacred surprise. I tend to be much better at surprises than he is; I will get excited, squirrel it all away to be wrapped up all nice and tidy with no price stickers and present it on the morning. He will ask me repeatedly what I want and sometimes offer it to me early. You can forget wrapping. Still, he's a great present-giver. And a great kisser.

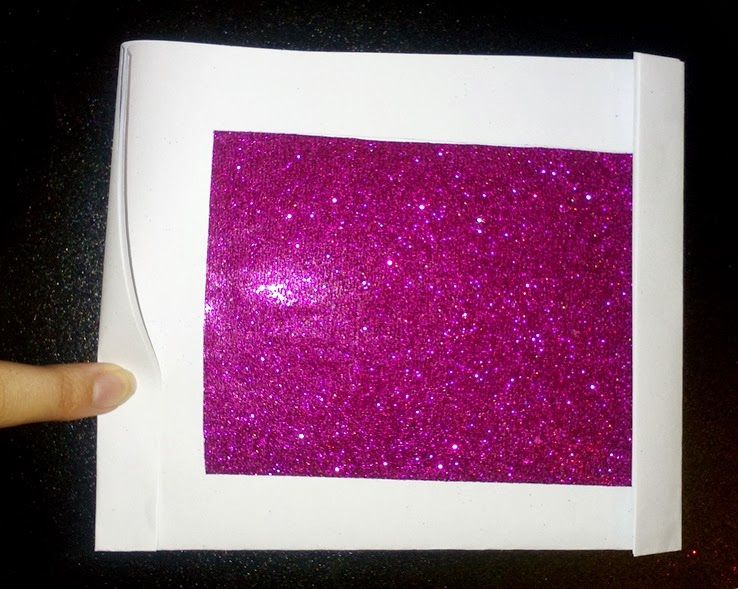
 This is an envelope you can put together from any nice scrap paper you have sitting around. While simple, it was surprisingly fiddly, and I tried to give the best instructions I could. I used one A4 sheet for my little card, but as you can see, it could have been done with quite a bit less. The 'template' below is a sample pattern for any old sheet of paper and is not likely to be proportionally accurate to A or B ratio papers, it's just for visual aid.


 Make your folds along the blue lines in the above diagram, making sure that your card is going to fit neatly (not too snug) inside the envelope. Make the cuts to get that funny, almost chevron shaped thing on the right there. Shown folded are flaps D and then B.


 First, fold the sheet in half, then lay it out flat again. Fold flaps A and B inward, then C outward, and in half again inward (D). You might want to take this opportunity to trim off awkward bits of flap, like the very pointy corners at the bottom of flap C.

 Open the thing (put your left hand in and shake it all about), tuck your completed card in the area under the inwardly folded A and B flaps, like this:


 Keep A flap folded down over the card, then fold at D. Fold C over to the back. And that's pretty much that. 
Front:

 Back:

 If it's going to be handled a lot or mailed, I would absolutely glue those C flaps right on down.


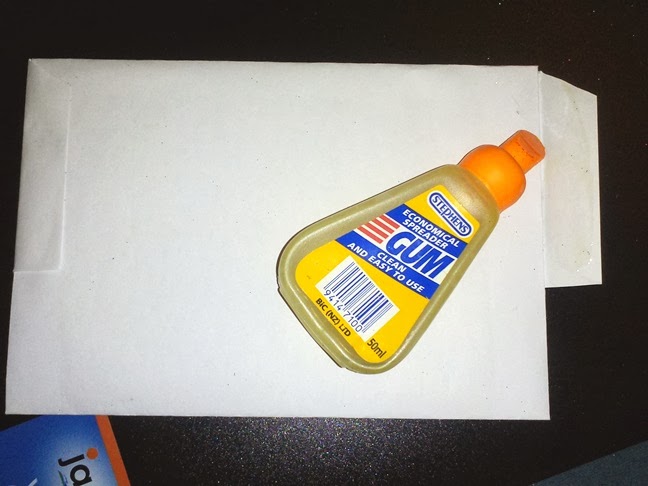
 Boom. Gummed. A totally DIY'ed envelope to go with your DIY'ed card, and totally not made of plain old printer paper. I hope that was comprehensible, if not leave a comment. It makes sense to me, haha.

 You might notice I like to make everything myself, partly because it usually works out to be deliciously cheap, partly because it exudes that just exquisite personal touch thing that people love. I did not hand make Paddy's gifts, but I did buy them on impulse, and that's what counts. I'm looking forward to the day myself, I know I'll get spoilt! How about you?!


Friday 31 January 2014

Super Simple Delicious Cheese Stuffed Meatballs

Boom. That's right. Cheese stuffed meatballs.

 Ok, well, welcome to my first blog post, and knowing that it is my first, be expecting lots of nervous jokes and disgusting, blurry, out-of-focus pics. I like to make crafty things, but mostly things that are functionally useful. I don't like to cook much, and I have few original recipes of my own, but this quick easy meatball recipe is the staple of 'Oh, it's my night to cook?' night, and always very well received. Seriously, they're delicious. Nothing like beef fat on beef fat. Stretchy, delicious beef fat.


 This recipe makes ten meatballs. Sometimes I have them as a side and have two, sometimes I have them as a main feature and have four; my partner, Paddy, can not do with less than five. He's still young, his metabolism is still galloping. Wait until he's about 35 and it collapses into a weak trot. Hah. Now, most people put sausage meat in meatballs, or add flour and egg or breadcrumbs. Not me. I'm a bit of a meatball purist, mostly because New Zealand beef is so deliciously flavourful on its own and doesn't need propped up by carbs and such. This is just beef and cheese, and optional seasonings and oils.

 Anyways. You get about 2-3 cups of beef mince/ground beef/hamburger and your cheese. I chose Edam because I like the taste and, lucky for me, it's very low fat. You'll need a bowl to mix it in, a knife, a pan to grill them in, and plates to eat them off. Forks are apparently optional in our house. Men. Oh! And preheat your oven on grill at about 250 Celsius.

 You put it in the bowl and add seasoning of your choice. I did add a pinch of fresh rosemary and a dash of Moroccan seasoning (you do not understand how much Moroccan seasoning I go through, it's AMAZEBALLS); I usually use 'mixed herbs' but I had none. Moroccan seasoning has salt and pepper in it, but usually I wouldn't add either.


 Mix it good. Yeah. Now, from your glorious block of cheese, cut 1 inch cubes. I cut a 1" slice and then cut it into 12 cubes, three of which became spare. I had two and my cat had one. The little boy down the lane got none. He's a jerk.

 Take a small handful and flatten it in your hand. You want the beef pretty well thawed if it's been frozen because this can be unpleasant if it's still frozen. Press a cheese cube into the middle and wrap the beef around. Squish away until the cube is deliciously encased in a sphere, and revel in this confused mix of geometry. Laugh a little if you want.

 Now place them in your pan. Yes, that's an old baking pan. Waste not want not, you know. I added a little oil to mine, you may not want to. I don't know you.


 Put them in the oven and grill them until-- until they're done. I love mine as 'pink' as possible but I thought I had better tone it down for the blog.


 Yeah, sizzle sizzle you tasty bastards.
Oh, right. And throw on some brown rice because you totally forgot about the rest of your meal. Or, have just cheesy meatballs like an animal. A wise animal.


 Teh deeeh. The cheese will ALWAYS claw its way out of a few just to totally ruin the surprise for your diners. You could serve those ones to yourself. I did. Yummm. Revenge.

 I hauled the rice and invisible vegetables out (I would have made some if it wasn't just me and the boyfriend, and I had remembered) and drizzled the juices from the pan of meatballs over it along with a bit of soy sauce, just because.


 And that is that. No fancy presentation, slapped on the plate and devoured ten seconds later. They were amazeballs, as expected. My flatmate was totally jealous when he came home, but it was 'cook for yourself' night. So there.

 If you make these, let me know how they turned out and how much you just love them!
-R. L. McClelland